Crochet Pattern Review & Guide
How to Crochet the Bermuda Tote: A Stunning Granny Square Bag You Will Absolutely Love
If you have been searching for a crochet bag pattern that is equal parts beachy, boho, and brilliantly wearable, your search ends right here. The Bermuda Tote, designed by the talented team at Two of Wands for Lion Brand Yarn, is the kind of project that stops people in their tracks and makes them ask, “Did you really make that yourself?” Spoiler: yes, you absolutely can.
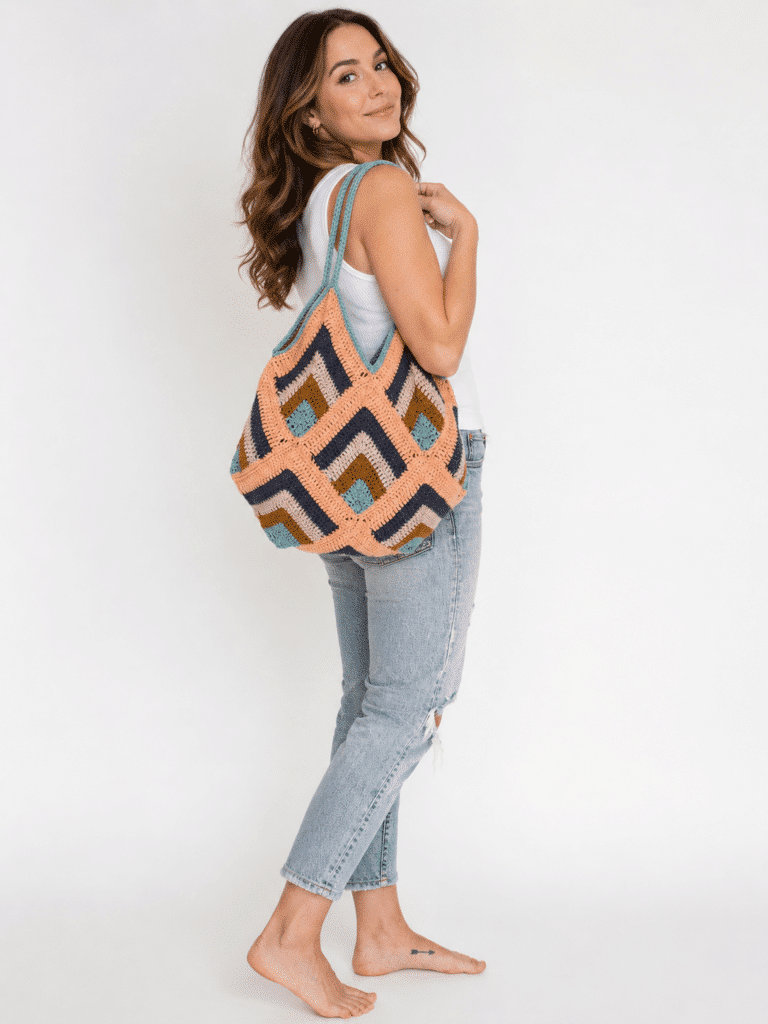
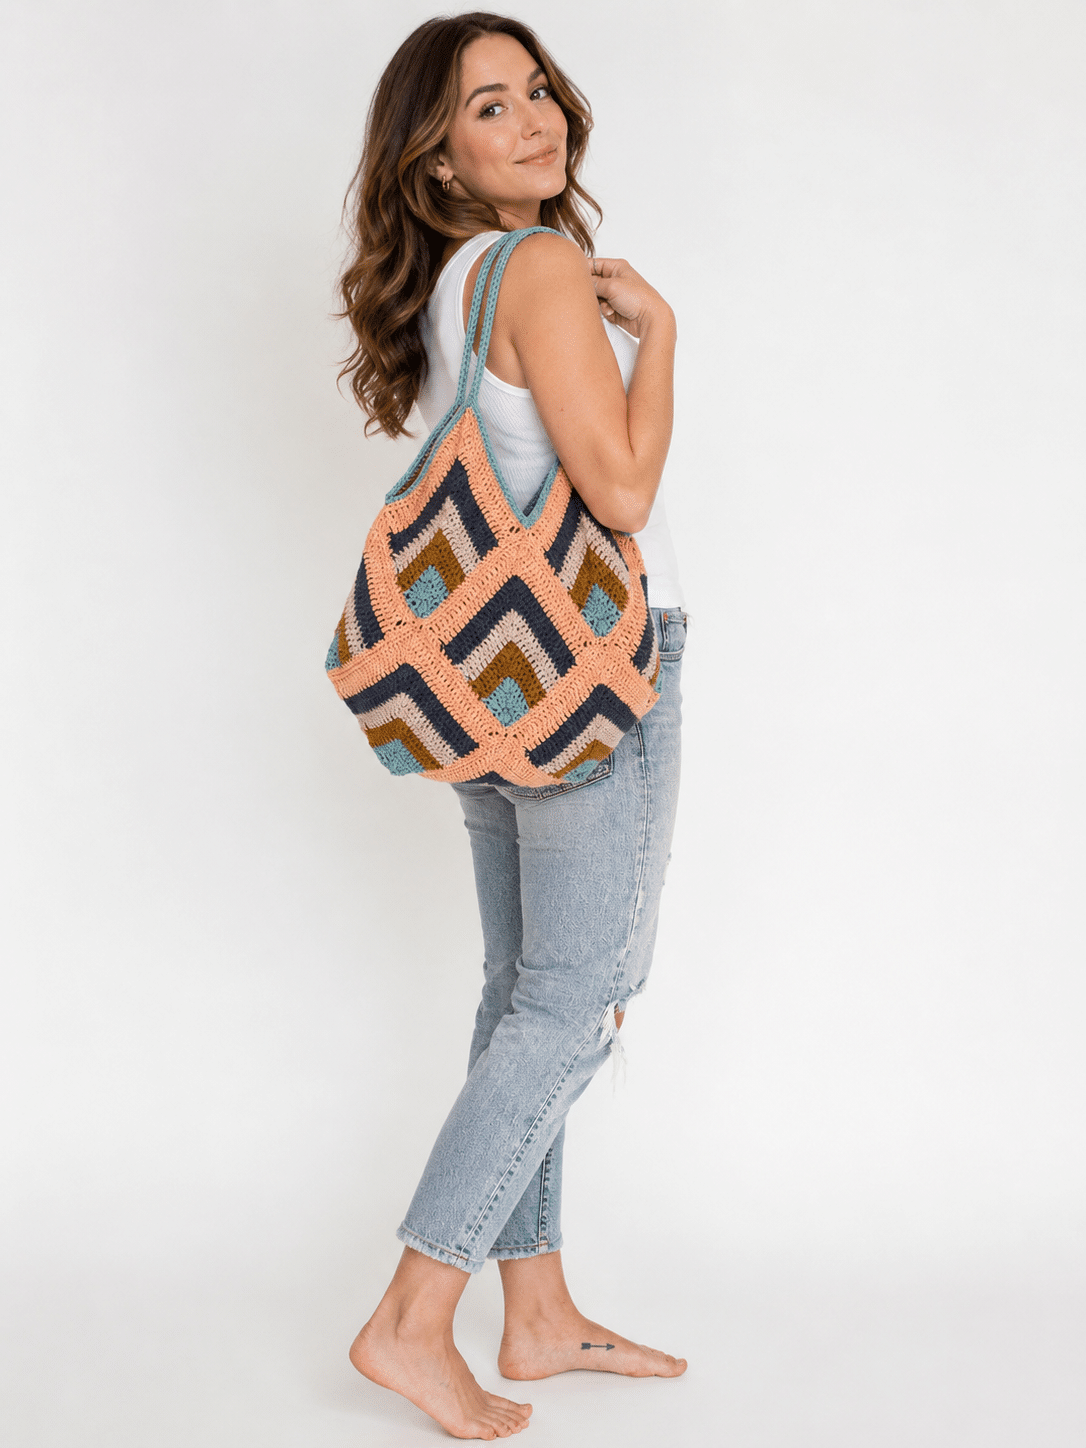
This gorgeous tote is built from 13 individual crocheted squares assembled into a slouchy, diamond-shaped bag that feels like a vacation in your hands. With its rich, earthy color palette inspired by the pink sand beaches and turquoise waters of Bermuda, this project is as satisfying to make as it is stunning to carry.
Whether you are a seasoned crocheter looking for your next show-stopping accessory or a confident beginner ready to level up, this article will walk you through everything you need to know before casting on your very first chain stitch.
Bermuda Tote: At a Glance
Before diving into the details, here is a quick snapshot of everything this project involves:
Materials
Everything you need to complete the Bermuda Tote is listed below. The official kit uses Lion Brand Color Theory yarn, a smooth worsted weight acrylic available in a wide range of sophisticated, paint-inspired colorways. You will need one full skein of each of the five colors listed, plus a small selection of basic tools.
-
Yarn: Lion Brand Color Theory — 1 skein each of 5 colors (worsted weight 4, approx. 246 yds / 225 m per skein). See the color breakdown below.
-
Crochet Hook: US G/6 (4 mm)
-
Removable Stitch Marker — used to track the all-important corner treble crochet stitch on each square.
-
Tapestry Needle — for seaming the squares together and weaving in yarn ends.
The Five-Color Yarn Palette
Each color plays a distinct role in the concentric geometric pattern of every square. Color A anchors the center and forms the outer edging and straps. Colors B through E build outward in striped pairs, creating the signature chevron-ring design.
Gauge
Matching gauge is critical for this project. Because the bag is assembled from 13 individual squares that must all be the same size, even a small tension difference will cause the finished squares to be slightly too large or too small, which makes seaming difficult and throws off the bag’s shape.
Always swatch before starting and adjust your hook size up or down until your swatch matches.
To check your gauge, crochet a small swatch in double crochet, wash and block it just as you would the finished squares, then measure. If you have too many stitches per 4 inches, try a larger hook. If you have too few, try a smaller hook. Do not proceed until your gauge matches — it will save you significant frustration during construction.
Finished Dimensions
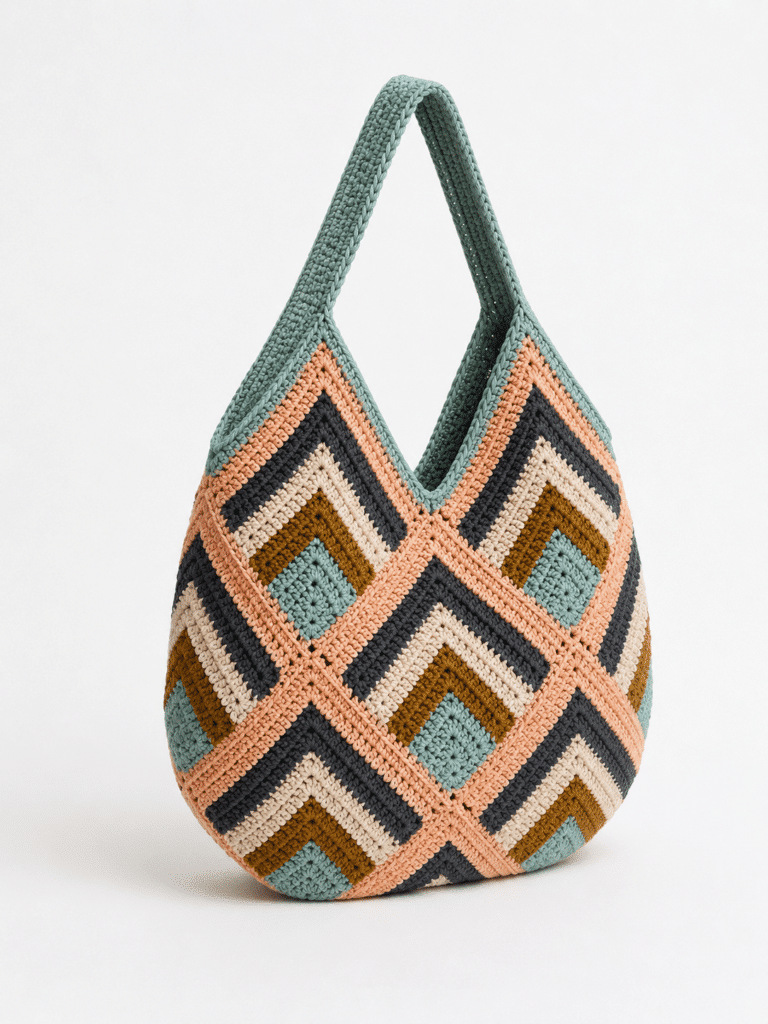
The completed Bermuda Tote is a generously sized everyday bag with a distinctive diamond silhouette. The measurements below reflect the finished, blocked, and assembled bag.
Each individual square, once blocked, measures 5.5 inches (14 cm) per side. The assembled body of the bag forms a large diamond shape approximately 15 inches wide and 15 inches tall, which sits beautifully over the shoulder thanks to the 16-inch integrated strap. The overall silhouette is relaxed and slouchy, perfectly suited to a boho-casual everyday style.
Abbreviations
This pattern is written in standard US crochet terms. All abbreviations used throughout the Bermuda Tote pattern are defined in the table below. If you are accustomed to UK crochet terminology, please note that US and UK terms differ, particularly for single and double crochet.
| Abbreviation | Full Term | Description |
|---|---|---|
| Ch | Chain | The foundation stitch of most crochet projects |
| Dc | Double Crochet | The main stitch used to build each square’s rows |
| Rep | Repeat | Work the bracketed instructions again as directed |
| Sc | Single Crochet | Used for the square border and strap construction |
| Sc2tog | Single Crochet 2 Together | A decrease stitch; joins two stitches into one |
| Sl st | Slip Stitch | Used to join the border round at the end |
| St(s) | Stitch(es) | Refers to individual crochet stitches |
| Tr | Treble Crochet | The corner stitch of each square; taller than a double crochet |
Note: The ch 3 at the beginning of each row counts as a stitch throughout this pattern. Work the first dc of each row into the 2nd stitch, and the last dc into the top of the turning chain from the row below.
Squares (Make 13) — Row-by-Row Color Guide
The Bermuda Tote is built from 13 identical squares, each worked flat in back-and-forth rows. Every square begins with a short chain and expands outward through a series of increase rows, with a treble crochet at the center corner creating the distinctive diamond shape. Each square cycles through all five colors as it grows. Place a removable stitch marker on the corner treble crochet at the end of Row 1 and move it up every row.
Important notes before you begin:
Work each square flat, turning at the end of every row. The ch 3 at the beginning of each row counts as a stitch. To change color, work the final yarn-over of the last stitch in the previous row with the new color. Carry the stitch marker up on the corner treble crochet each row so you always know where the center increase point is.
Repeat this entire sequence 13 times to make all the squares needed for the bag. Each completed square before its border has 44 double crochets and 1 treble crochet at its widest row.
Square Border
Once all 11 rows of the square body are complete, a single round of single crochet is worked around all four edges of the square while still using Color E. This border serves two important purposes: it evens out the edges and gives each square a clean, finished perimeter that makes seaming much easier and neater.
Here is how the border round progresses around the square:
- First side edge: Chain 1, then work 2 single crochets into the side of each dc row along the first side edge (22 rows = 22 dc). Work 2 single crochets into the corner at the top to turn the corner.
- Second side edge: Work 2 single crochets into each dc row along the second side edge, then 2 single crochets into the top corner to turn again.
- Top edge (cast-on end): Starting in the top of the stitch just worked, single crochet into each stitch along this edge (22 stitches). Work 2 single crochets into the corner treble crochet to turn.
- Final side edge: Single crochet along the remaining edge, then 2 single crochets into the final corner. Slip stitch to the first single crochet to close the round.
- Finish: Fasten off. Secure and weave in all yarn tails before moving on to the next square. The completed border produces 96 sc around the perimeter.
After completing the border on all 13 squares, block each one to 5.5 inches (14 cm) before proceeding to construction. This is an essential step — do not skip it.
Construction
This is where the magic happens. The 13 individual squares come together through a combination of strategic seaming and folding to form the finished three-dimensional bag. Take your time with this section — read through the full construction steps and study the schematic diagram in the original pattern before picking up your tapestry needle.
Step 1: Block All Squares
Before seaming a single edge, block every square to 5.5 inches (14 cm). Pin each square to a foam blocking mat using rust-proof pins and mist with water, or use your preferred blocking method for your chosen yarn. Allow all squares to dry completely before removing pins.
Step 2: Arrange the Squares
Lay your 13 blocked squares out on a flat surface in the diamond arrangement shown in the pattern’s numbered schematic. Squares 1 through 13 are positioned in a specific layout that determines which edges will be seamed, which squares will fold, and which will form the opening of the bag at the top.
Step 3: Seam the Squares Together
Using a whip stitch or your preferred seaming technique (such as a slip stitch join), seam the squares together by matching the labeled edges in the schematic. The diagram uses color-coded letter pairs to show which side connects to which. Here is a summary of the key seam pairings:
Work all seams with a relaxed, even tension to avoid pulling the fabric and distorting the geometric pattern. Once all seams are complete, secure and weave in any remaining yarn tails.
Step 4: Outer Edging and Straps
With the front of the assembled bag facing up and using Color A (Tourmaline), rejoin the yarn along the right side edge of square 2. The outer edging and straps are worked in a series of four rounds of single crochet directly onto the finished bag body, with the strap formed by chaining across the gap between the two top opening edges and then reinforcing those chains with single crochet rounds on both the front and back. Decrease stitches (sc2tog) are used at the corner points of the bag opening to keep the edge neat and angular.
The result is a sturdy, integrated strap with no sewn-on attachment points, finished in the teal Tourmaline that frames the entire bag and ties the color palette together beautifully. Once all four edging rounds are complete, fasten off, secure all remaining ends, and your Bermuda Tote is finished.
Why Crocheters Are Falling in Love with This Pattern
The Bermuda Tote has quickly become one of the most talked-about crochet bag patterns in the handmade community, and it is not hard to see why. This design checks every box that modern crocheters care about.
A Color Palette Straight Out of a Travel Dream
The official colorway pairs five coordinating shades from the Lion Brand Color Theory line, creating a geometric, retro-modern look that feels right at home at a farmers market, a beach boardwalk, or a weekend brunch. The palette moves through warm blush tones, golden earth, cool stone, deep navy, and airy teal in a way that feels intentionally curated rather than casually thrown together.
Modular Construction That Makes It Approachable
Because the entire bag is made from individual squares that are seamed together, this pattern breaks a potentially overwhelming project into 13 small, satisfying pieces. Each square is identical in construction, which means there is a very satisfying learning curve: by the time you finish your third square, you will be flying through the remaining ten with total confidence.
Versatile Enough for Any Season
Thanks to the worsted weight yarn and dense double crochet construction, this tote has real structure. It can hold a book, sunscreen, a water bottle, and your farmer’s market haul without losing its shape. Yet its boho aesthetic keeps it from feeling heavy or utilitarian.
Materials and Yarn Recommendations
The pattern is designed around Lion Brand Color Theory, a smooth, 100% acrylic worsted weight yarn that comes in a beautiful range of sophisticated, paint-inspired shades. Each skein offers approximately 246 yards (225 meters), and you will need one skein of each of the five colors used in this design.
The Official Color Palette
Here are the five colors used in the Bermuda Tote and the role each one plays in the finished design:
Tourmaline (a soft teal) is used for the center of each square and also for the exterior edging and straps, giving the bag its signature color pop. The remaining four colors build outward in concentric chevron-like bands, creating the bold geometric pattern that makes this tote so visually striking.
Can You Substitute the Yarn?
Absolutely. While Lion Brand Color Theory produces gorgeous results and is specifically designed for this kit, you can substitute any smooth, well-plied worsted weight yarn as long as you match the gauge. Look for yarns with good stitch definition, since the geometric pattern really depends on clean, crisp lines. Avoid brushed or fuzzy yarns for this particular project, as they will obscure the color-block design.
For an elevated version, worsted weight cotton yarn gives the bag beautiful drape and makes it even more beach-bag appropriate. Pima cotton, in particular, produces stunning stitch definition.
Other Tools You Will Need
Beyond your yarn, the supply list for this project is refreshingly minimal. You will need a US G/6 (4 mm) crochet hook, a tapestry needle for weaving in ends and seaming the squares, and a removable stitch marker to track the corner treble crochet stitch as you work each square. That is genuinely it.
Is the Bermuda Tote Right for Your Skill Level?
The pattern is rated Level 2 Easy, which means it sits comfortably between absolute beginner and intermediate. If you know how to chain, do a single crochet, a double crochet, and a treble crochet, you have everything you need to complete this project successfully.
The trickiest parts of this project are not the stitches themselves but the construction phase, specifically understanding how the seamed squares fold and connect to form the three-dimensional bag shape. The pattern includes a clear schematic diagram showing the numbered squares and their folding orientation, which makes the assembly process much more intuitive than it sounds on paper.
One technique that will feel new to less experienced crocheters is the color change method: each color swap happens at the very last yarn-over of the final stitch in the previous row, which creates crisp, clean color transitions. This is a completely learnable skill and a fantastic one to add to your crochet toolkit.
How the Bermuda Tote Is Constructed: A Project Overview
Understanding the construction logic before you start makes the whole process significantly smoother. Here is a plain-language breakdown of how this bag comes together, without reproducing any pattern instructions.
Phase One: Making the Squares
The heart of this project is a single square motif that you will repeat thirteen times. Each square is worked flat, back and forth in rows rather than in the round, starting from a small chain and expanding outward through a series of increase rows. The corner of each square is marked with a treble crochet stitch that creates the distinctive diamond shape. As you work outward, you change colors every two rows, cycling through the five palette colors and building up those concentric geometric rings that give the finished bag its retro charm.
Each square gets a single crochet border worked around all four edges before it is set aside, which gives the motif a clean, finished edge that makes seaming much easier later.
Phase Two: Blocking
Blocking is a non-negotiable step for this project. Every square needs to be blocked to a uniform 5.5 inches (14 cm) before seaming. This step ensures that all 13 squares are identical in size, which is essential for the geometric construction to align properly. Wet blocking with pins on a foam mat produces the best results with acrylic yarn. If you are using a higher-fiber-content yarn like cotton or wool, you have even more flexibility in how you shape the pieces.
Phase Three: Seaming
The pattern provides a detailed schematic showing exactly how the 13 squares are arranged and which edges are seamed together. The bag takes shape through a combination of flat seaming and strategic folding, with certain squares forming the sides and bottom of the tote by being folded in half. The seaming method is your choice: a whip stitch works beautifully and creates a visible join that can be positioned on the inside, while a slip stitch seam from the right side creates a bold, intentional ridge that becomes part of the design aesthetic.
Phase Four: The Edging and Strap
Once the bag body is assembled, the strap and outer edging are crocheted directly onto the finished bag using the main color. The strap is formed by chaining a long bridge between the two top edges of the tote, which is then reinforced with additional rounds of single crochet to give it strength and durability. This integrated strap construction means there are no attachment points to worry about, and the finished strap has a substantial, woven-cord feel that holds up beautifully under the weight of the bag’s contents.
Expert Tips and Tricks for a Beautiful Bermuda Tote
Pro Tips for Crochet Success
- Use a removable stitch marker on the corner treble crochet from the very beginning and move it up every single row. That corner stitch is the anchor of the entire square design, and losing track of it will throw off your stitch count.
- Swatch before you start. Check your gauge against the pattern specification (17 stitches by 9 rows equals 4 inches in double crochet) and adjust your hook size if needed. A square that is even a quarter inch off will cause problems when you are seaming 13 of them together.
- When changing colors, always carry the new yarn up inside the previous stitches for at least a few stitches before making the switch. This reduces the number of ends you need to weave in later and keeps the back of your work clean.
- Block each square individually before seaming rather than waiting until the bag is assembled. It is much easier to shape and pin individual 5.5-inch squares than to block a fully constructed bag.
- Read the construction schematic carefully at least twice before you pick up your tapestry needle to seam. Take a pencil and lightly number each physical square to match the diagram so you do not accidentally seam the wrong edges together.
- When working the square border, pay close attention to the note about inserting the hook under two bars of the side of the stitch rather than around the full post. This small technique makes a significant difference in preventing unsightly holes along the side edges.
- Give your strap a few extra rounds of single crochet if you plan to carry heavy items. The pattern produces a comfortable strap for lightweight use, but reinforcement pays off if you are a heavy carrier.
Common Mistakes to Avoid
Watch Out For These Pitfalls
Skipping the gauge swatch: This is the number one mistake that leads to frustrated crocheters with mismatched squares. Do not skip it.
Forgetting that the turning chain counts as a stitch: The pattern notes clearly that the ch 3 at the beginning of each row counts as a stitch, and the first dc of each row goes into the second stitch. Missing this will cause your stitch count to drift and your square to look uneven.
Rushing the blocking step: Squares that are not blocked to the correct size will create a finished bag that looks puckered, wonky, or simply will not lie flat. Allow your blocked squares to dry completely before seaming.
Seaming too tightly: An overly tight seam will pull the squares together and distort the beautiful diamond pattern. Work your seaming stitches with a relaxed tension to preserve the fabric’s drape.
Not weaving in ends securely: With five color changes per square and 13 squares total, you will have a significant number of yarn tails to manage. Weave each end in at least two directions through the stitches to prevent them from working loose over time.
How to Style and Gift the Bermuda Tote
One of the most exciting things about finishing a project this beautiful is deciding how to use it or share it. Here are some ideas for both.
Beach Day Essential
The diamond shape and roomy interior make this the perfect beach bag. Tuck in a towel, sunscreen, a paperback, and sunglasses for the ultimate handmade beach look.
Market Bag
The sturdy worsted weight construction holds up beautifully for farmers market runs. The geometric pattern turns an ordinary grocery trip into a style moment.
Boho Day Bag
Pair the Bermuda Tote with a linen maxi dress and sandals for effortless warm-weather style. The earthy palette coordinates with nearly every casual summer wardrobe.
Gift for a Yarn Lover
Know someone who crochets? Gift them the Lion Brand kit along with a printed copy of the pattern. It is a thoughtful, curated present that any fiber artist will love.
Craft Fair Bestseller
If you sell your handmade work, this tote is a guaranteed attention-grabber at craft fairs. The impressive visual impact commands a price point that reflects your skill and time.
Customized Colorway
Use the same construction with a completely different palette to make this bag your own. Desert neutrals, jewel tones, or even a monochromatic ombré version would all be stunning.
Final Thoughts: Is the Bermuda Tote Worth Making?
Without a single reservation, the answer is a resounding yes. The Bermuda Tote by Two of Wands is one of those rare patterns that delivers at every stage of the process. The individual squares are satisfying to work up and quick enough to stay interesting. The color changes add just enough complexity to keep you engaged without ever becoming frustrating. The construction process is genuinely clever, turning a flat arrangement of diamond-shaped squares into a three-dimensional bag with real personality.
The finished product is exactly what it promises to be: a beautiful, functional, one-of-a-kind accessory that showcases the magic of handmade crochet. This is the kind of bag you will carry proudly all summer long and pull out again every season after that.
If you make this tote, share your finished project using the hashtag #crewofwands on Instagram to join the wonderful community of makers who have brought this pattern to life in their own color combinations and personal style. Happy crocheting!
Frequently Asked Questions